CptCurl
|
| (.450 member) |
| 14/04/13 10:44 PM |

|
|
|
To All:
We can thank 470Evans for sharing his project with us. And we can especially thank Paul Hodgens for documenting his impeccable work in words and photographs.
I have taken the liberty to link Mr. Hodgens' words and photographs to this thread. All came from his site: Stocking a W.J. Jeffery double-rifle.
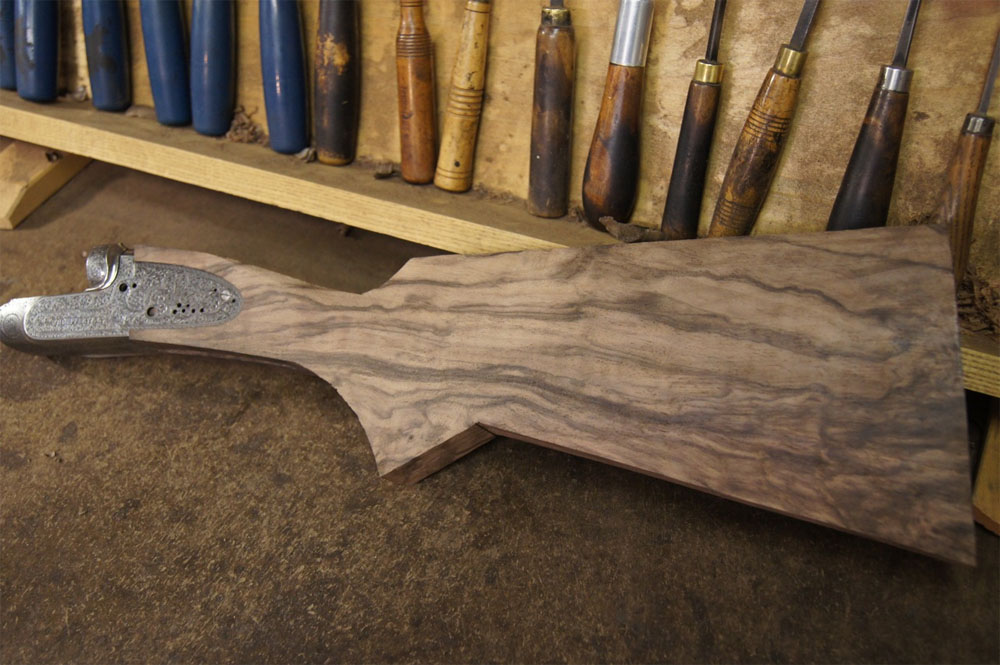
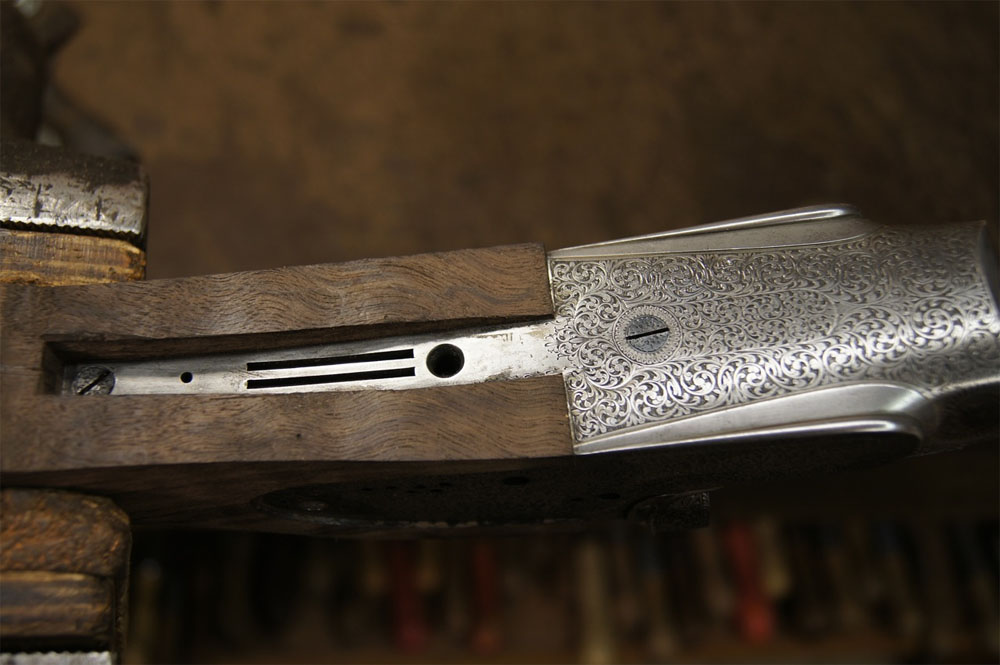
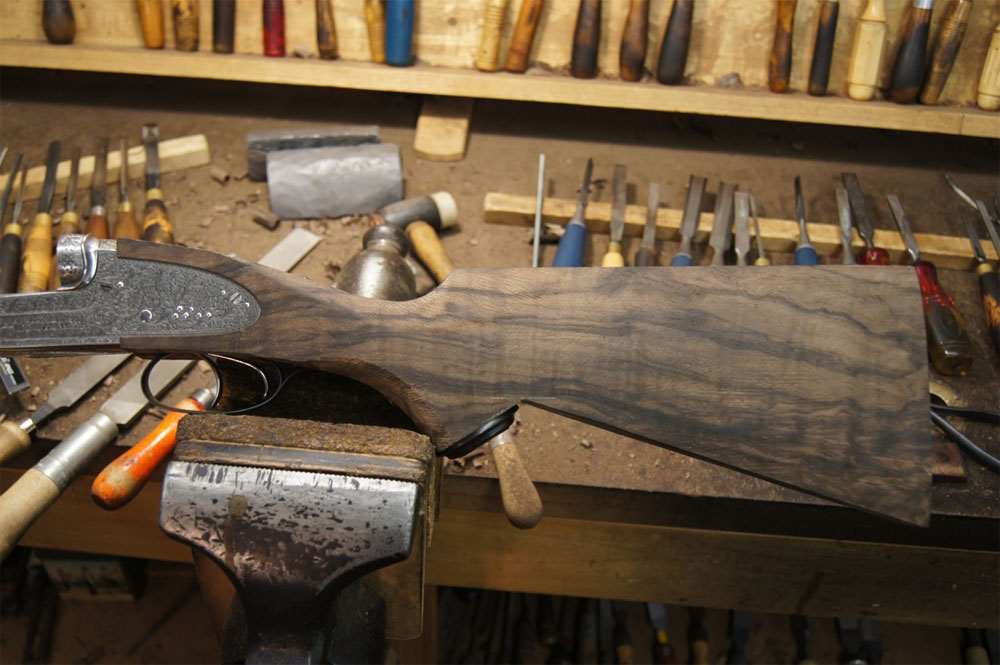
1. The stock blank, cut and ready for the stocking procedure. The fore-end wood will be the portion shown below the pistol-grip/toe-line.

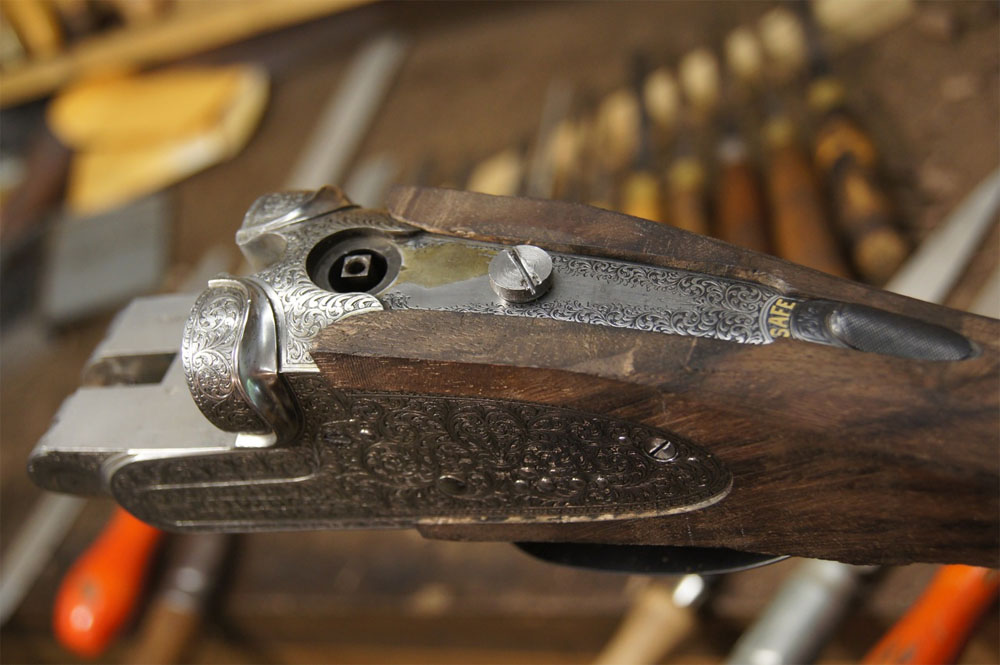
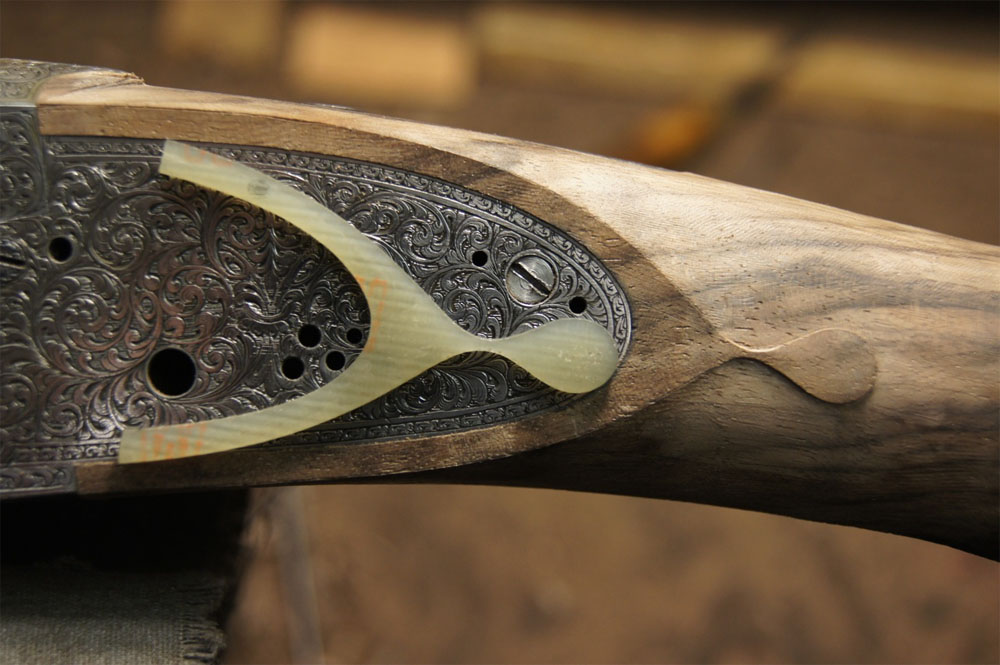
2. Action has been fitted to the wood, "headed-up", here showing the bearing or mating surface of the back of the action, (the recoil accepting surface).

3. Another view of the previous shot showing the top-strap inlet.
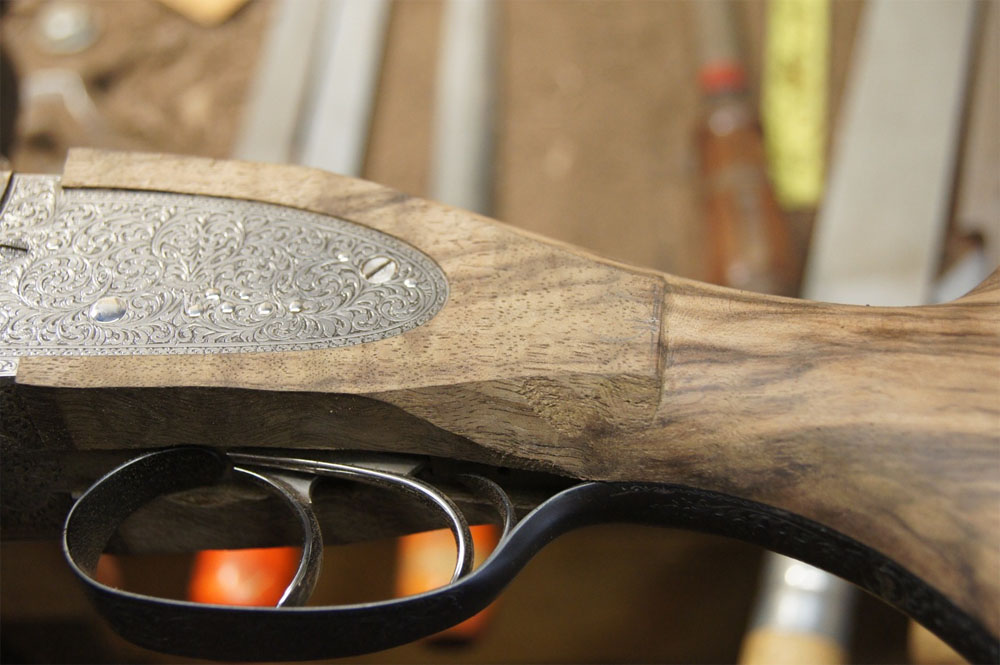
4. Completely "headed-up"----trigger-plate and lock-plates fitted and the block shaved down. This picture showing the left side of the stock.
5. View of the trigger-plate inletted.
6. View of the action and right lock-plate.
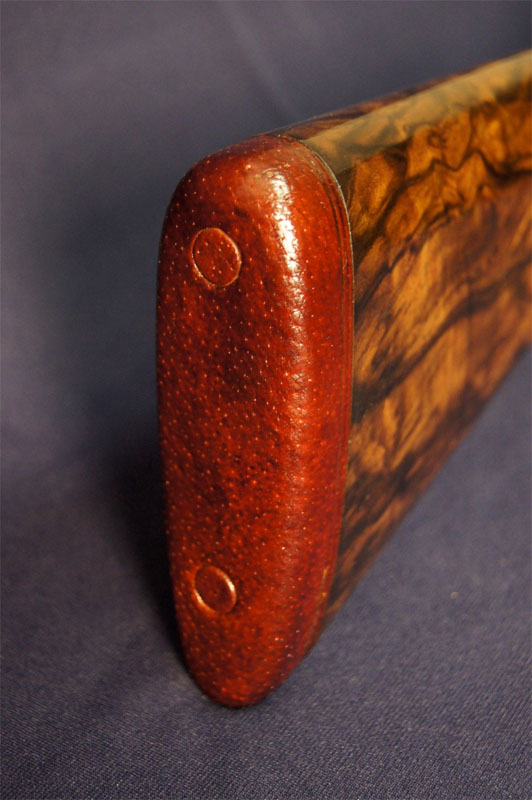
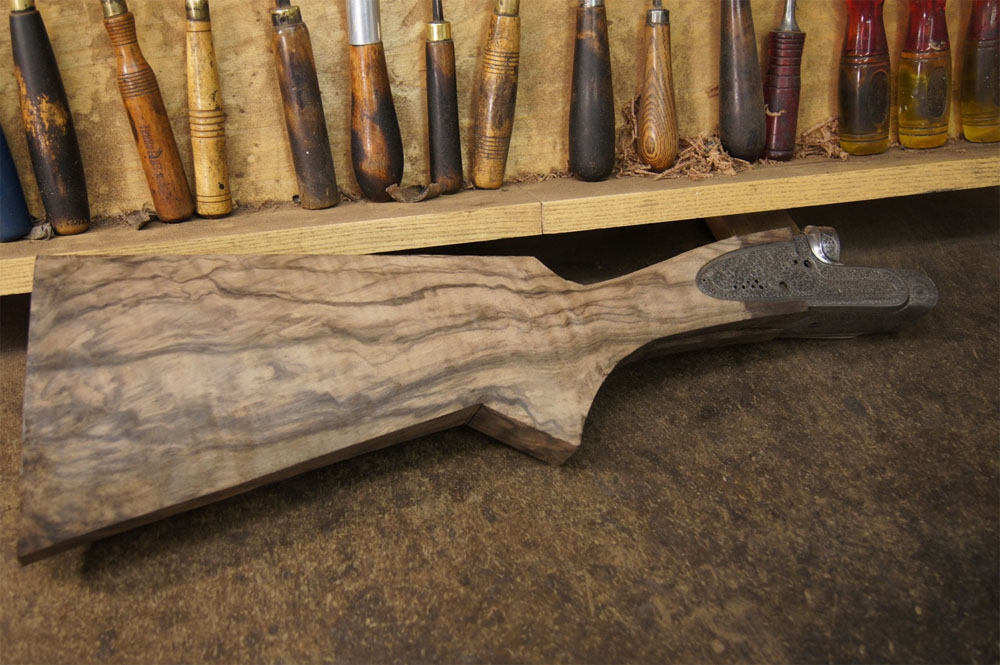
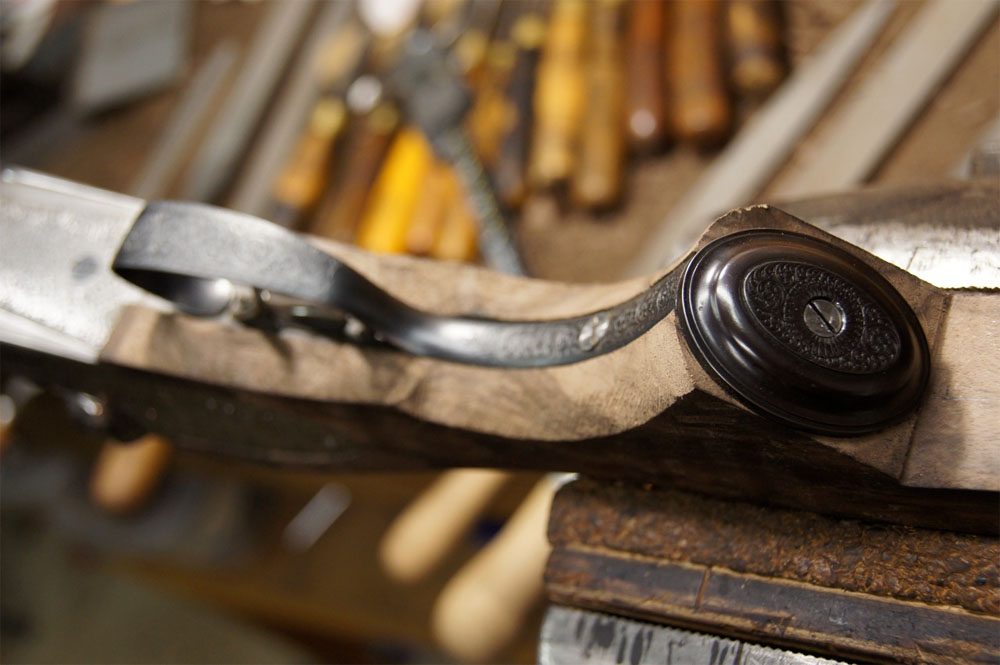
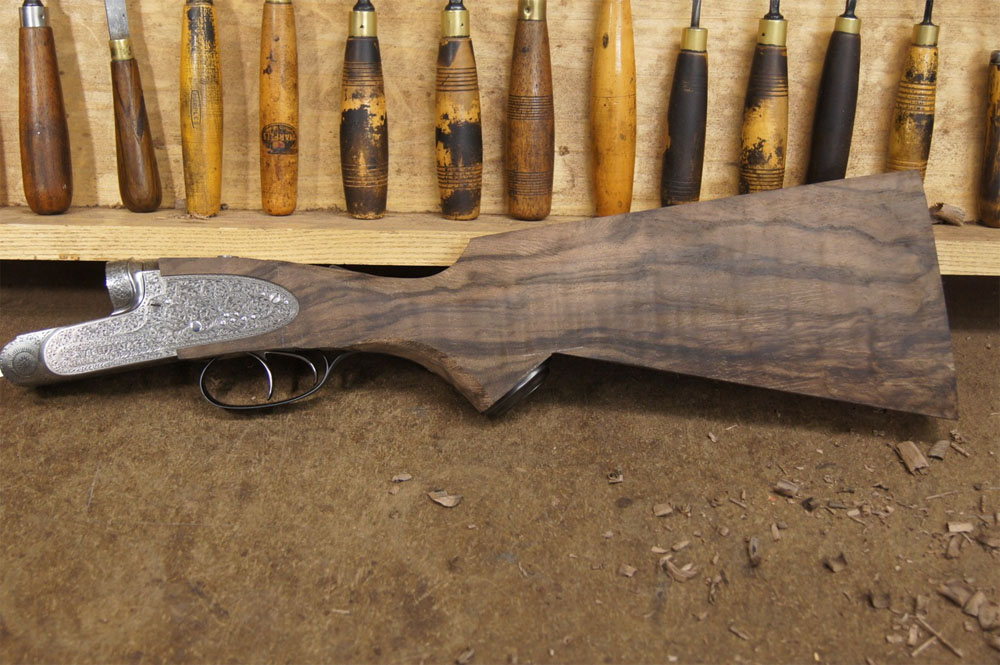
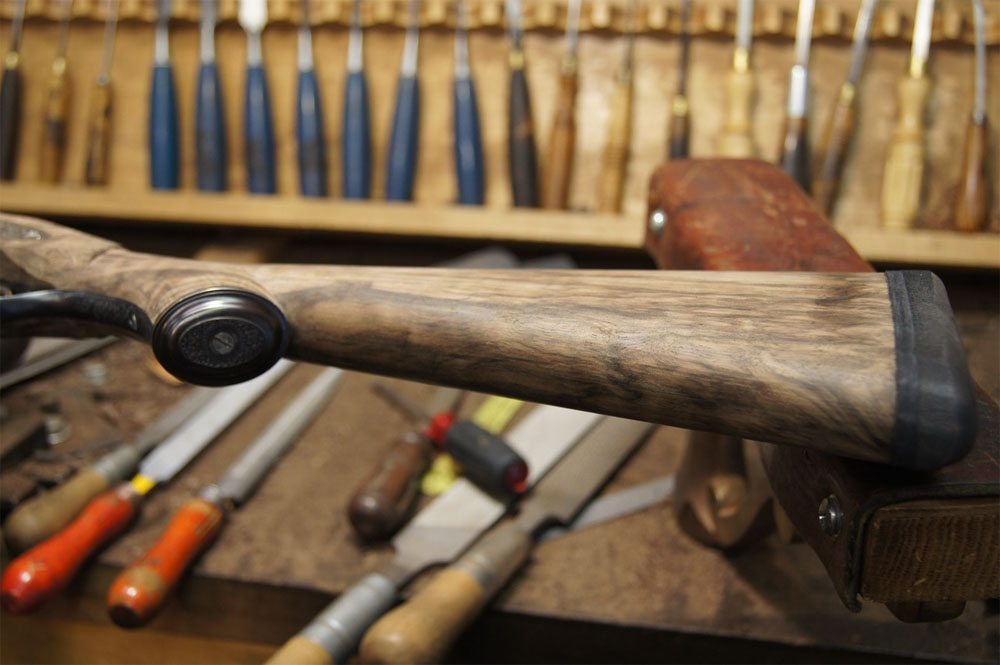
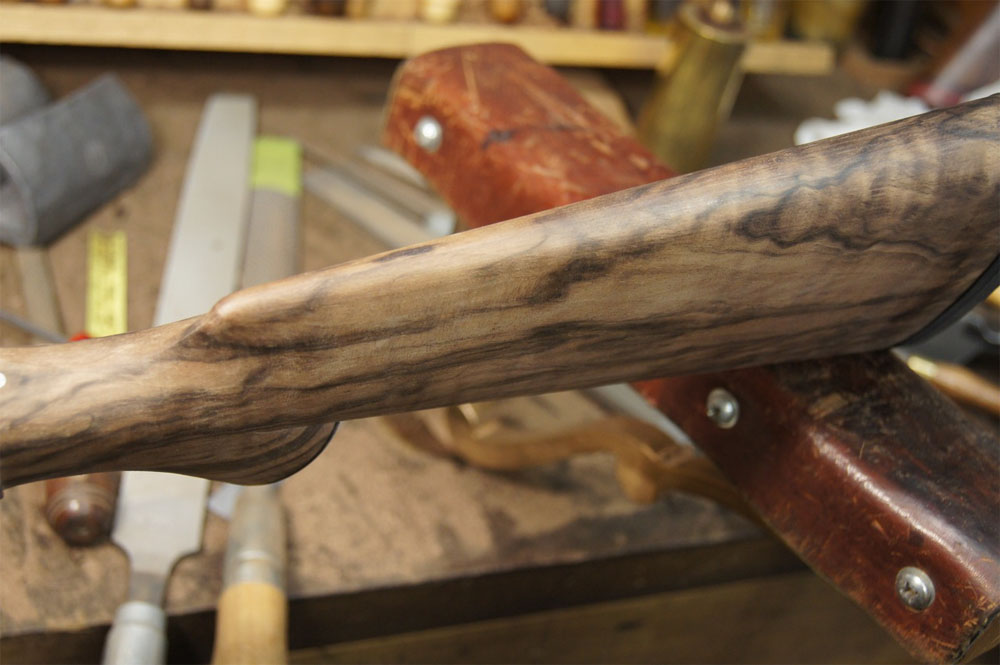
7. Right side of stock.
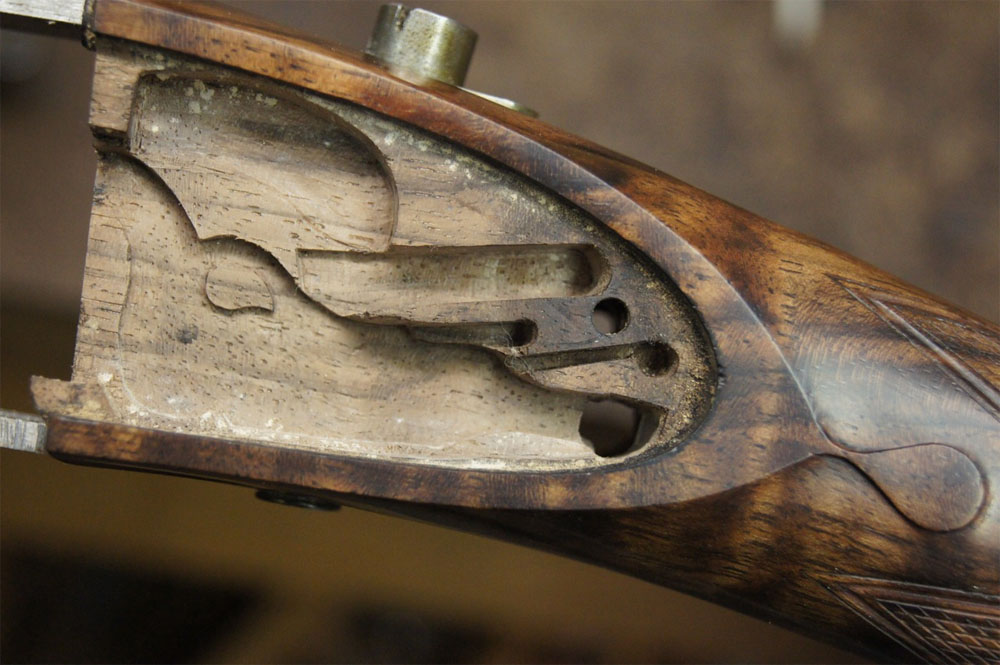
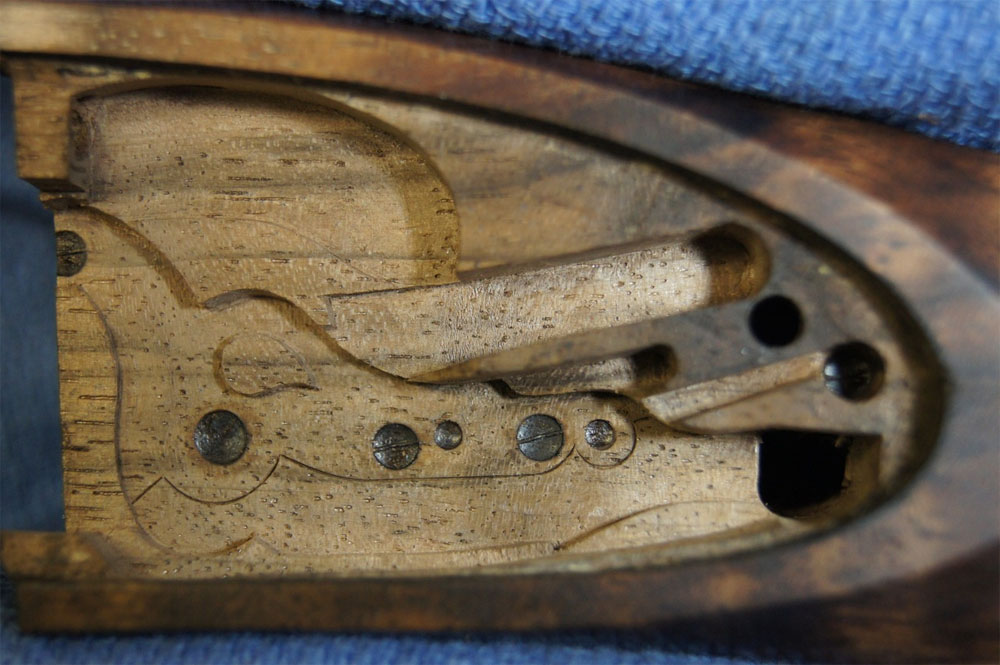
8. View showing left lock-plate removed, lockwork ready to be inletted.
9. View of inletting of left lock.

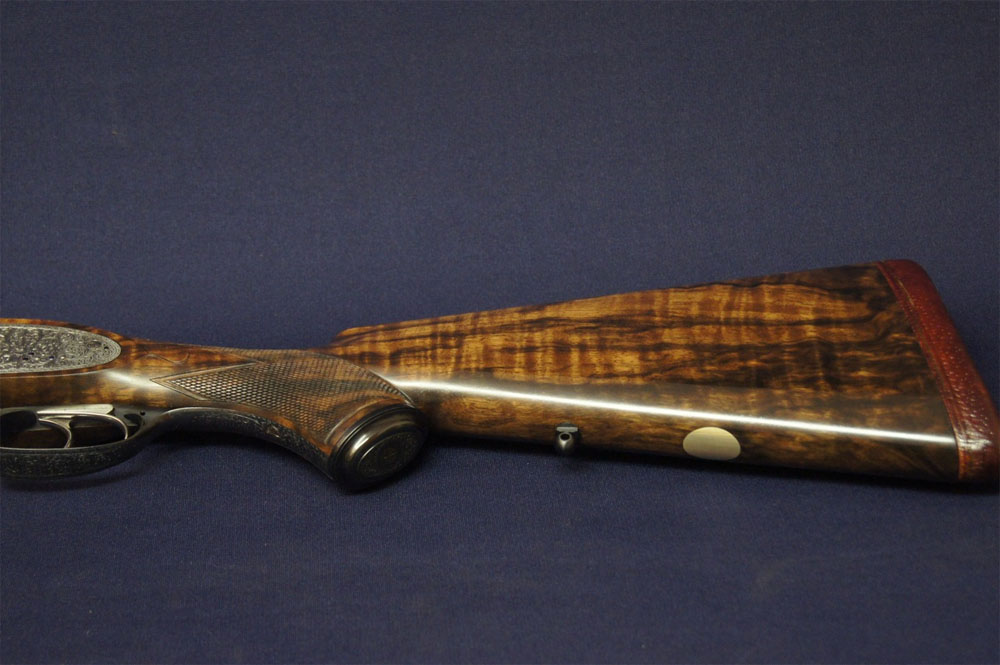
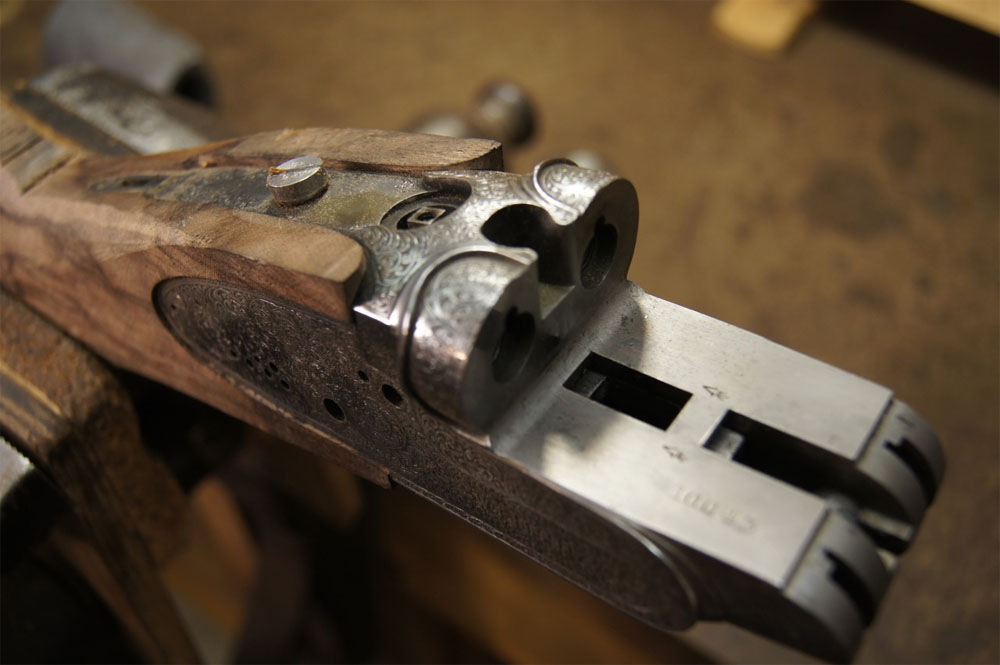
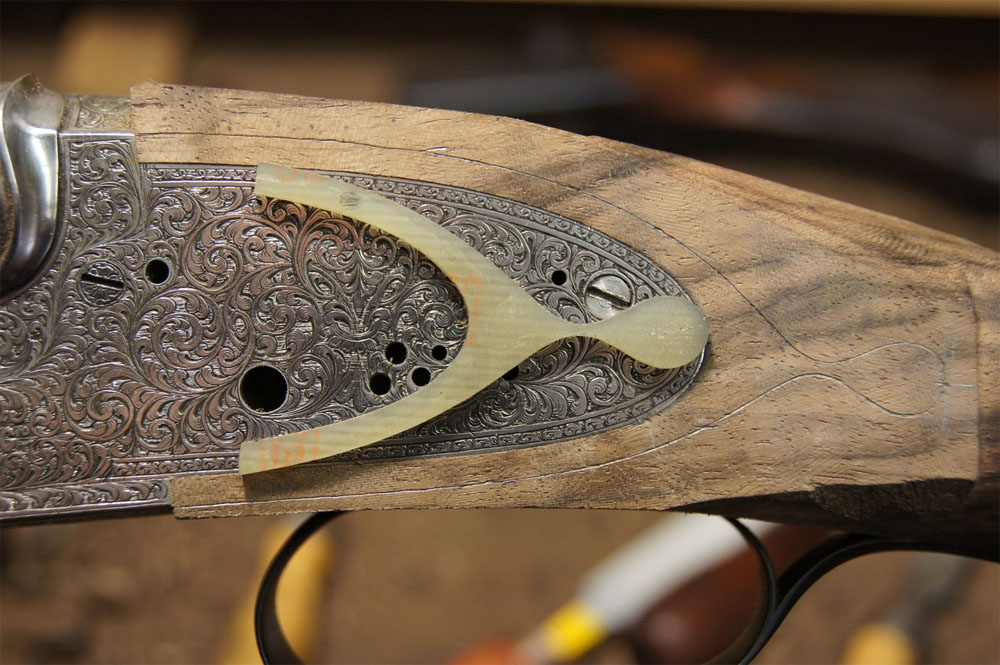
10. All inletting completed and parts fitted. This view shows the grip cap and guard with "slave" pins.
11. This is a better view of the guard.
12. View of action, left lock and "slave" breech pin and "side-nail" (screw that holds in the lock-plates, seen at upper right of the plate).
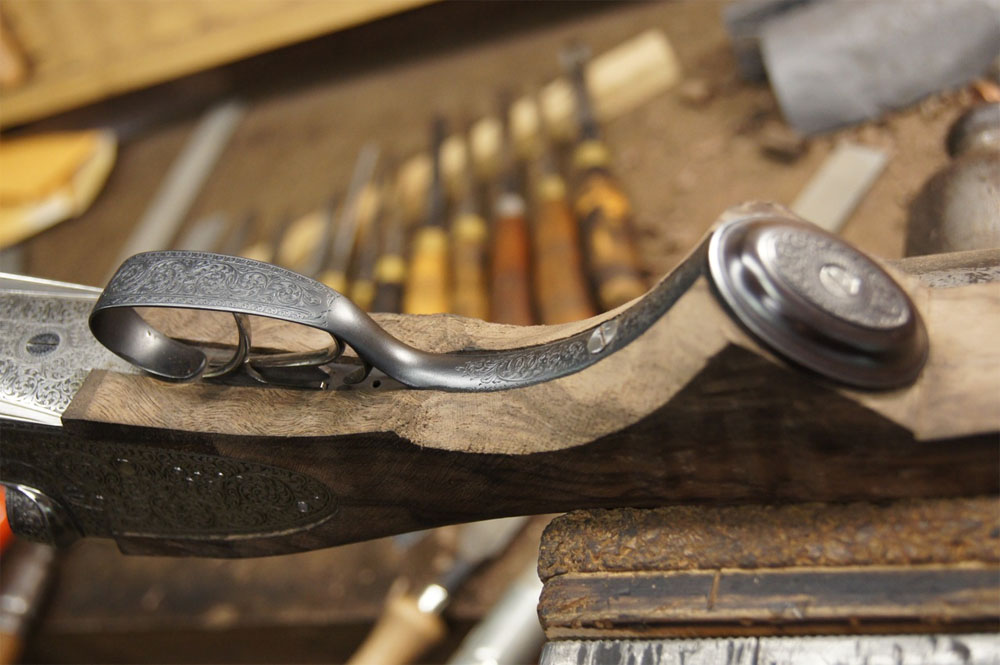
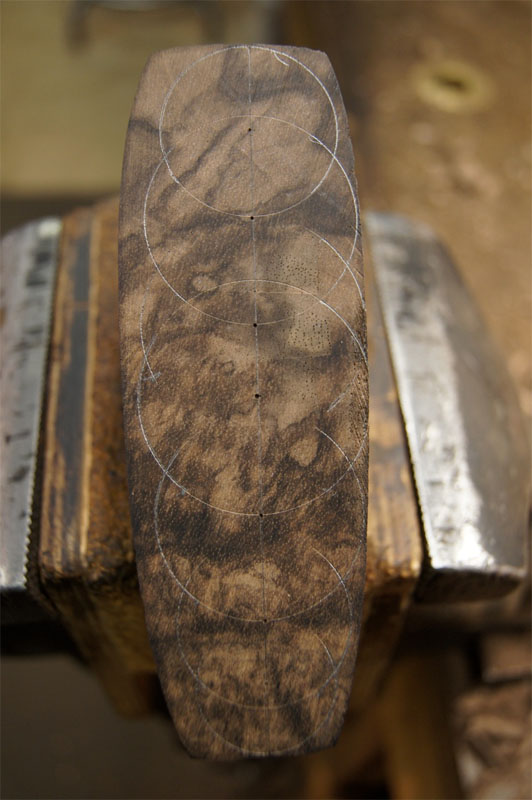
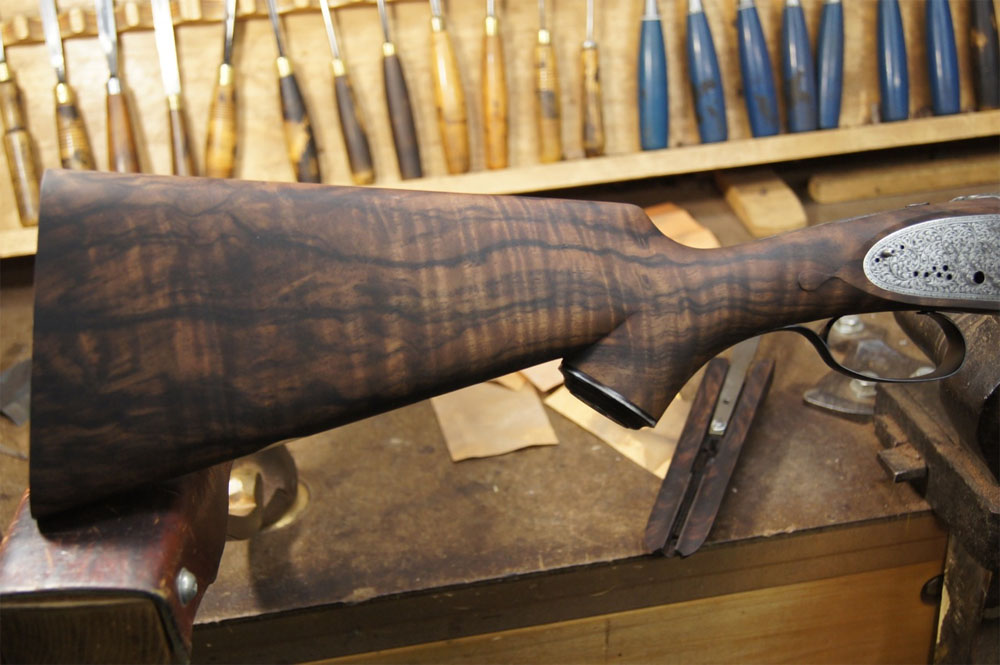
13. Left side profile of the stock. Measurements defined (length, drop & cast).
14. These scribed circles are to maintain the cast and determine the butt-end shape.
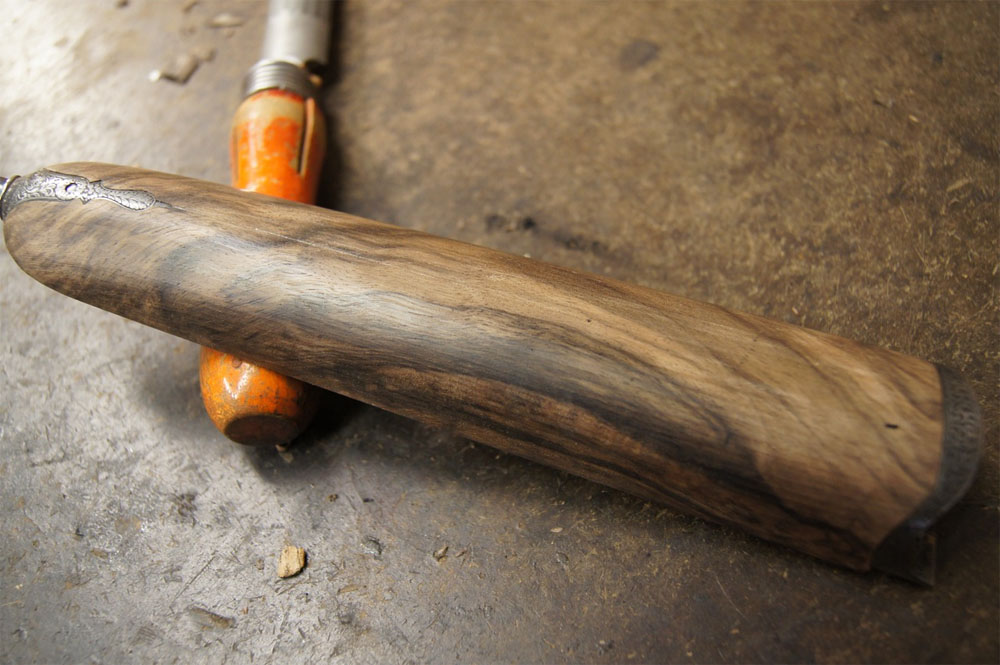
15. Another view of the left side after all inletting completed.
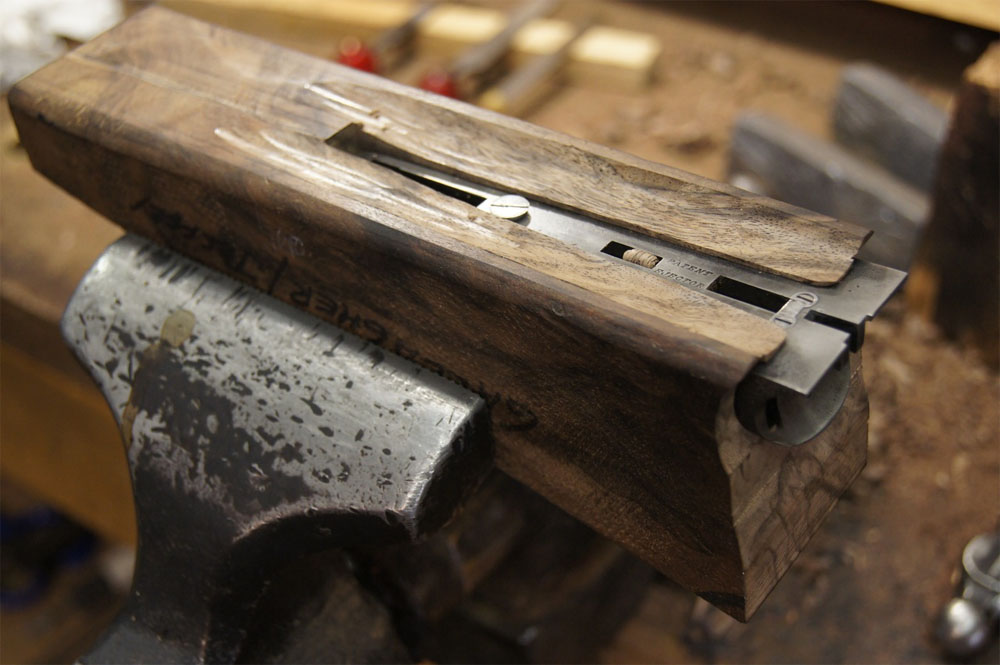
16. Back end of stock (area from rear of drop-points/bow of guard) "made-off" (shaped) to final contours with pad added to length required.

17. View of grip cap and toe-line.
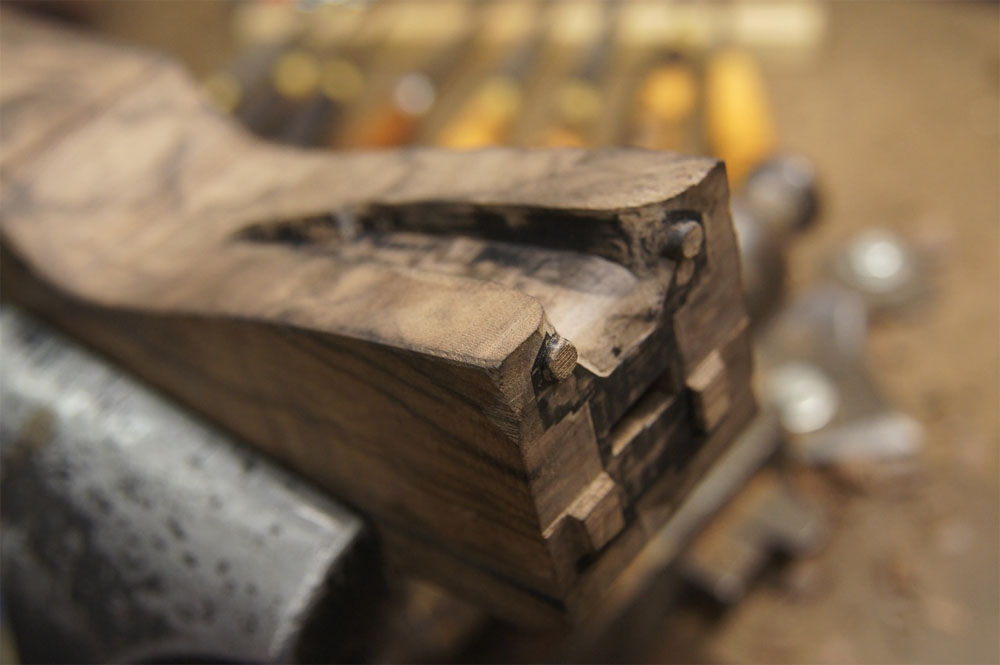
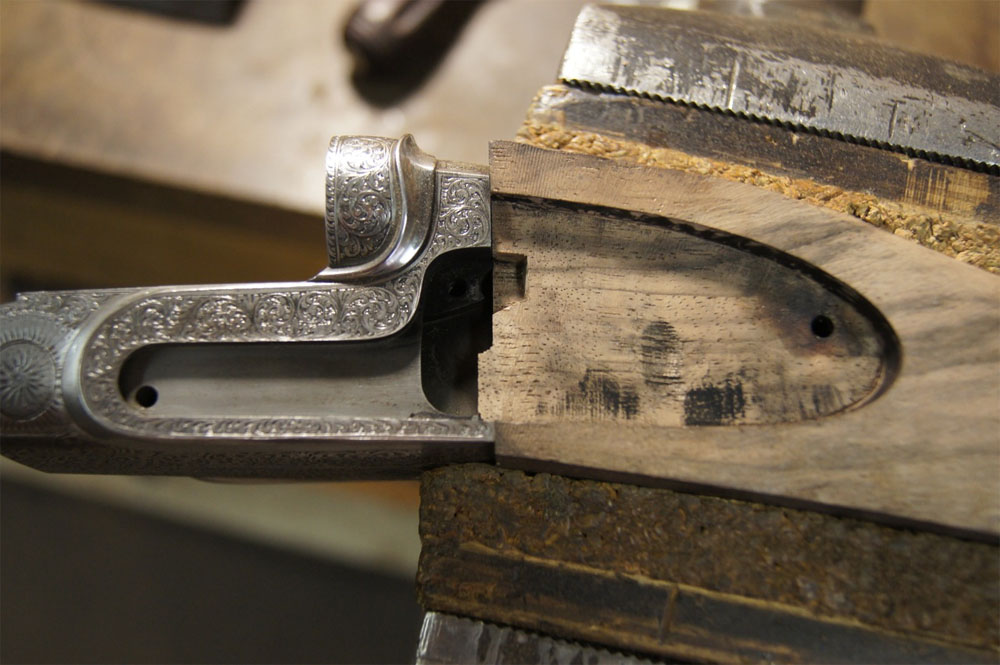
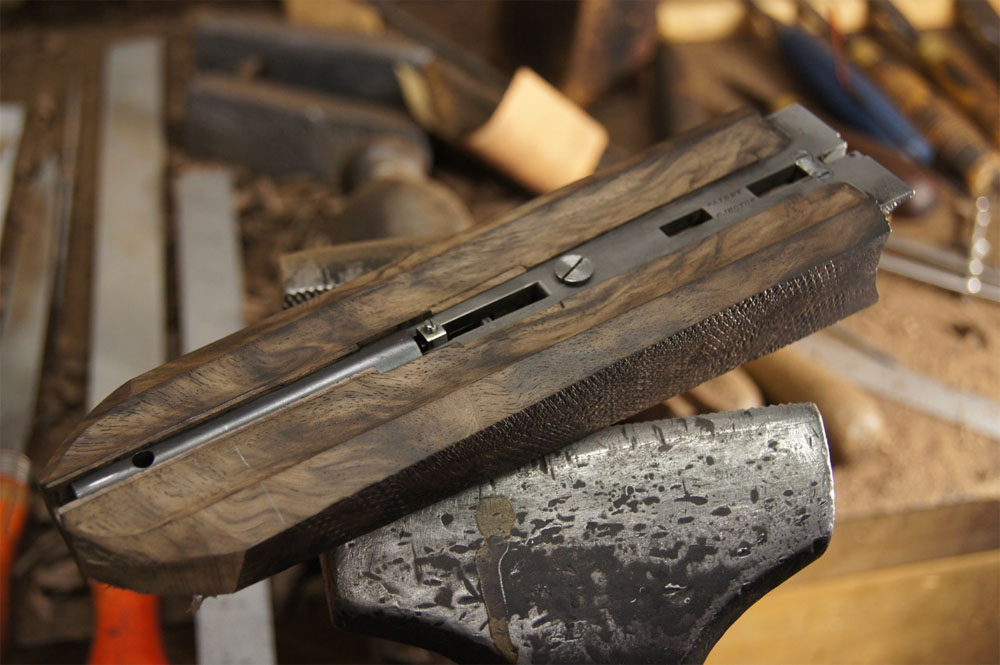
18. View from rear of stock.
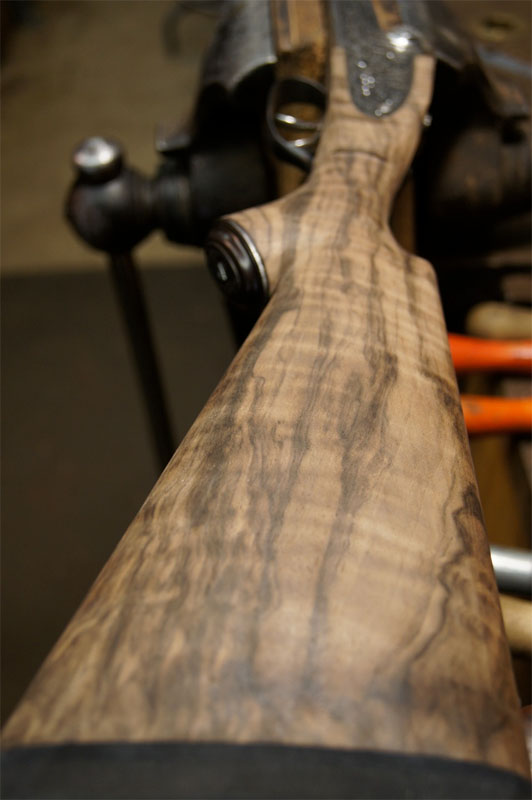
19. View of comb of stock.
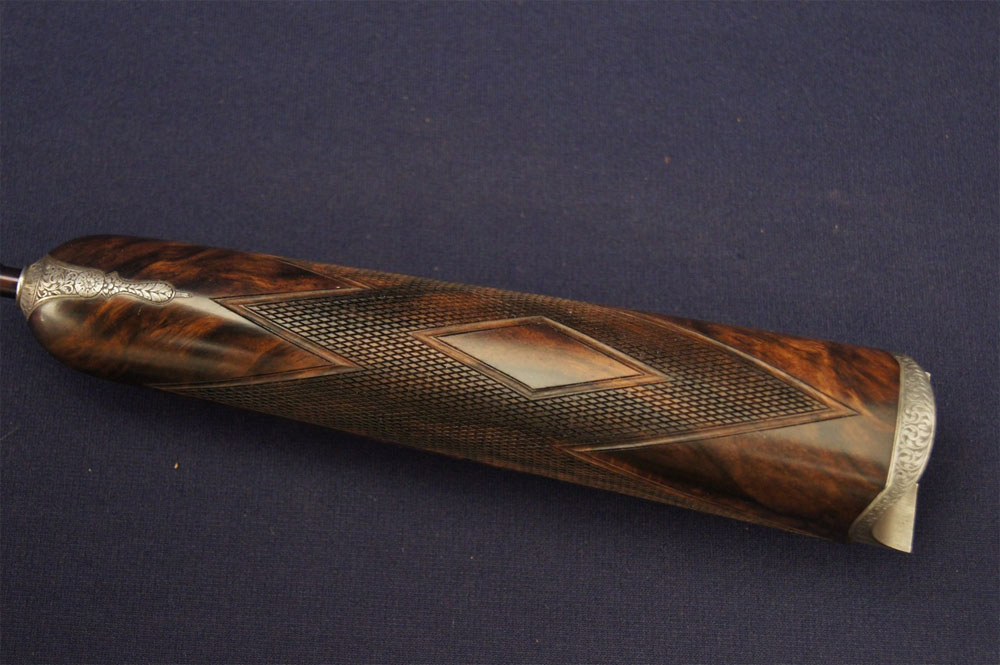
20. Head area where "drop-points" will be situated.
21. All internal parts removed, wood filed down to correct level around lock plates and "drop-points" marked out, showing template used.
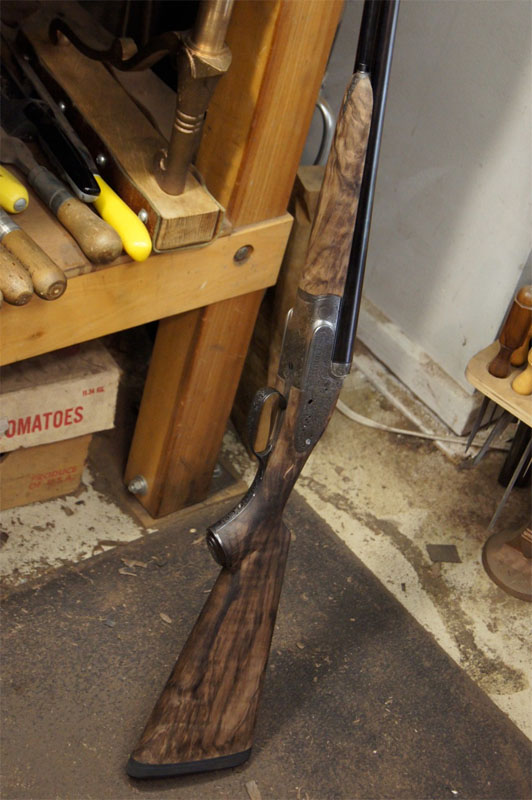
22. Drop-points now cut and filed.
23. Finish cut point showing template.
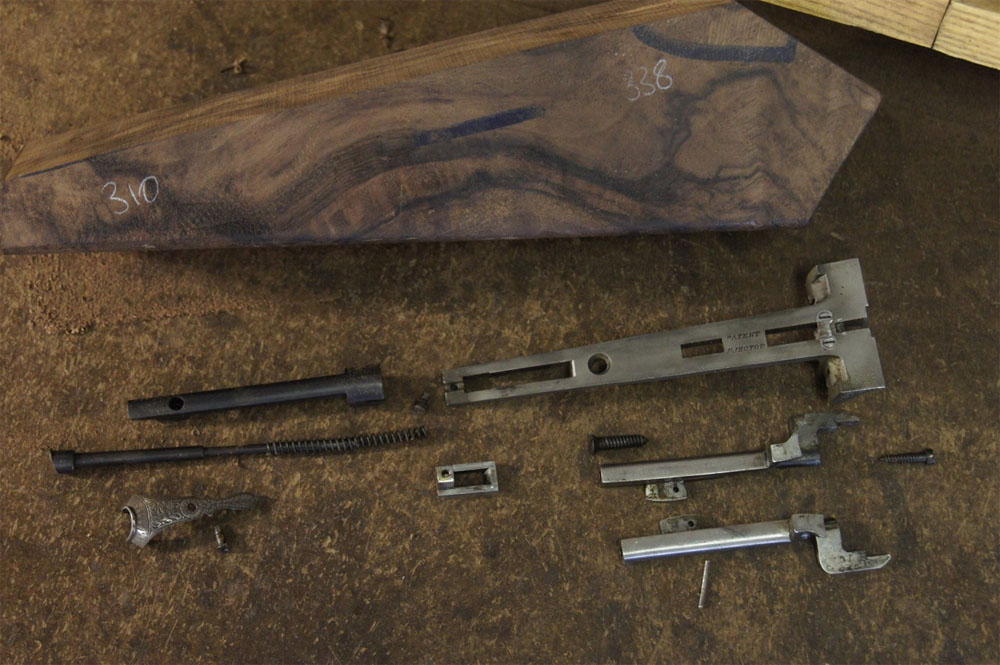
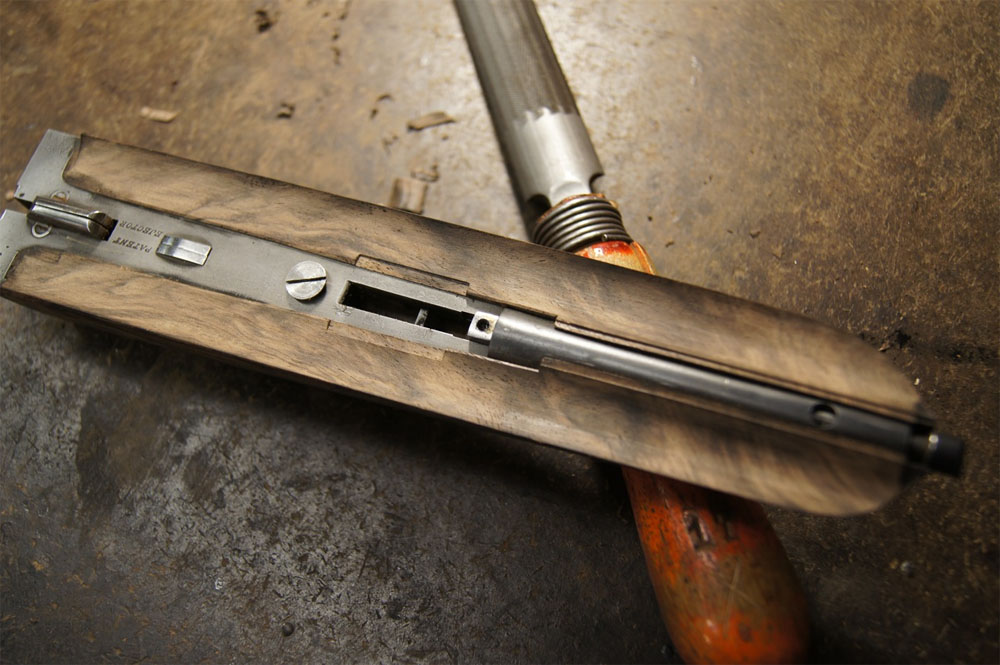
24. Fore-end wood with all metal parts.
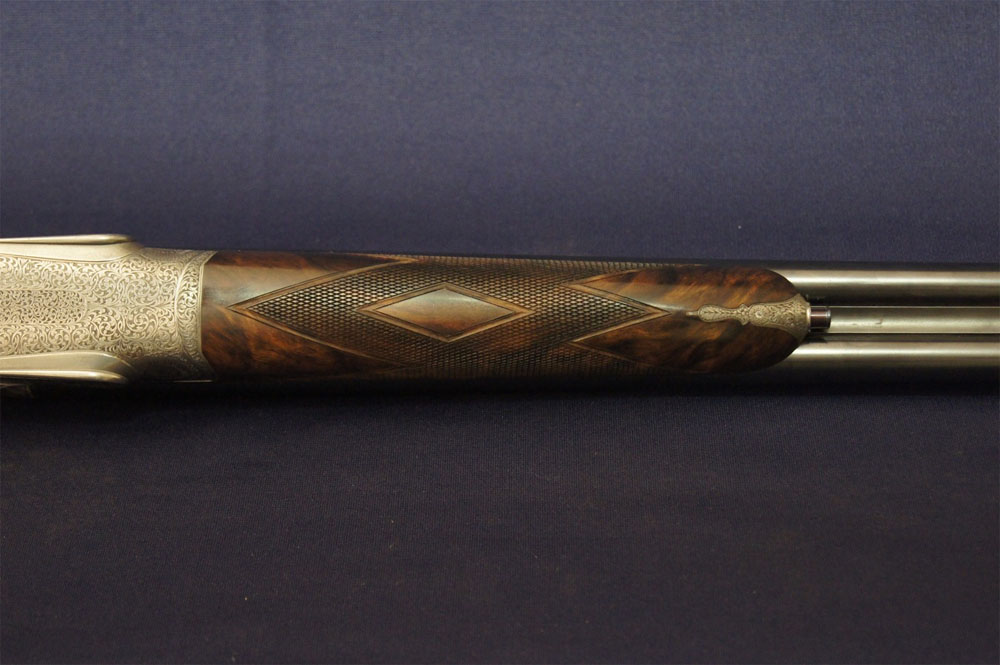
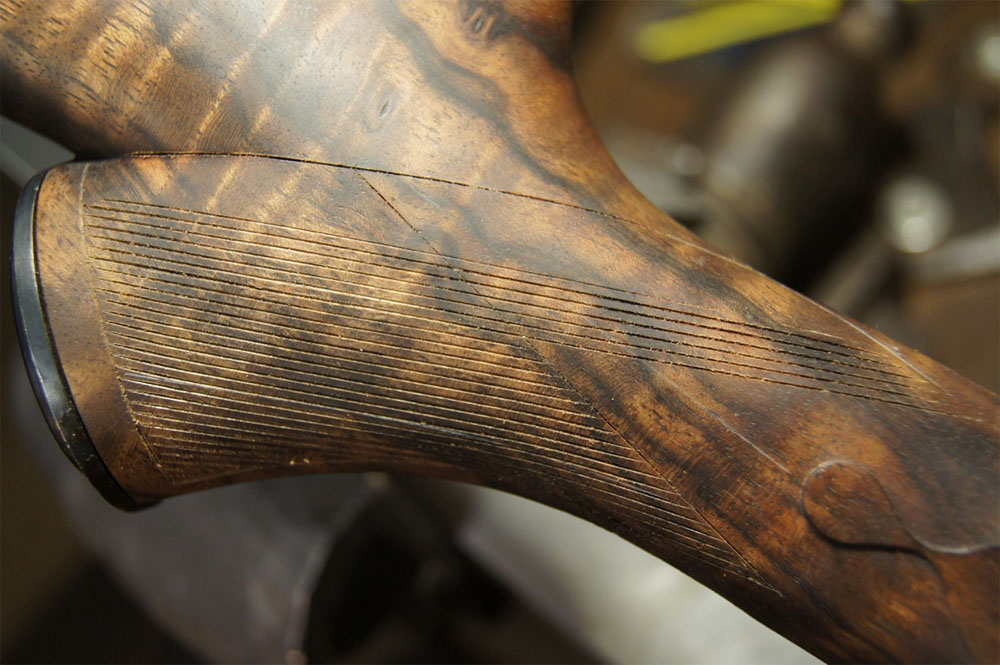
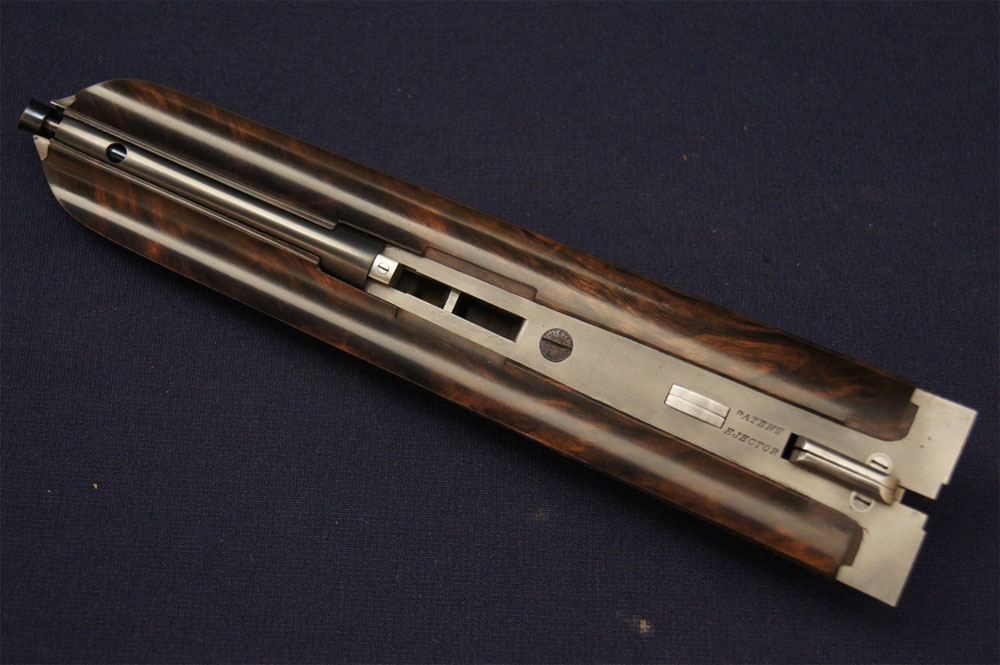
25. Fore-end iron fitted to wood and in the process of cutting in the barrel channels.
26. Fore-end iron, tube, bolt fitted into wood and wood fitted down on to barrels.
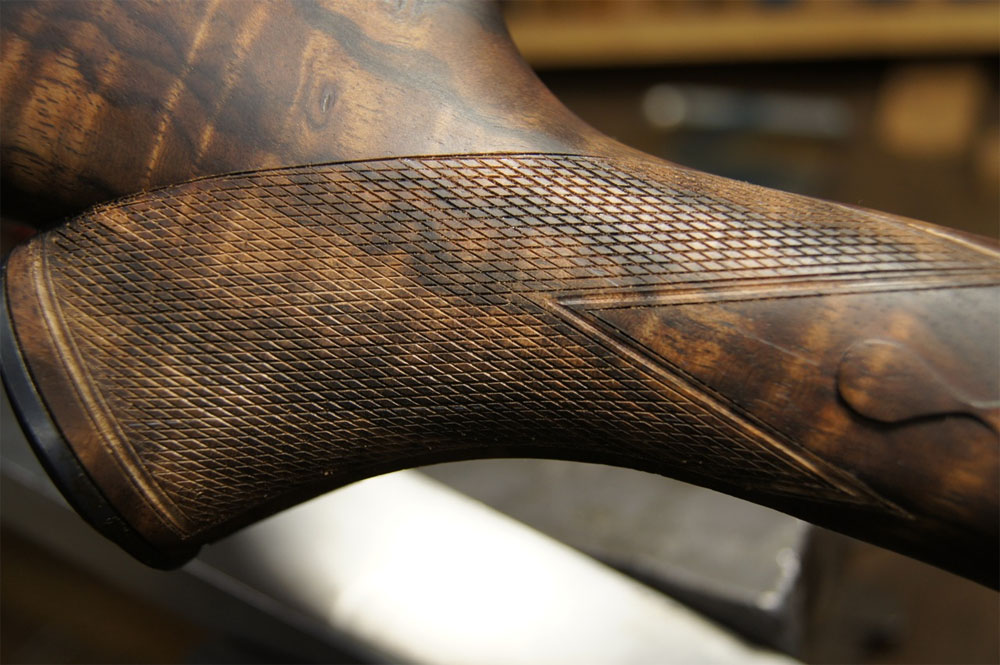
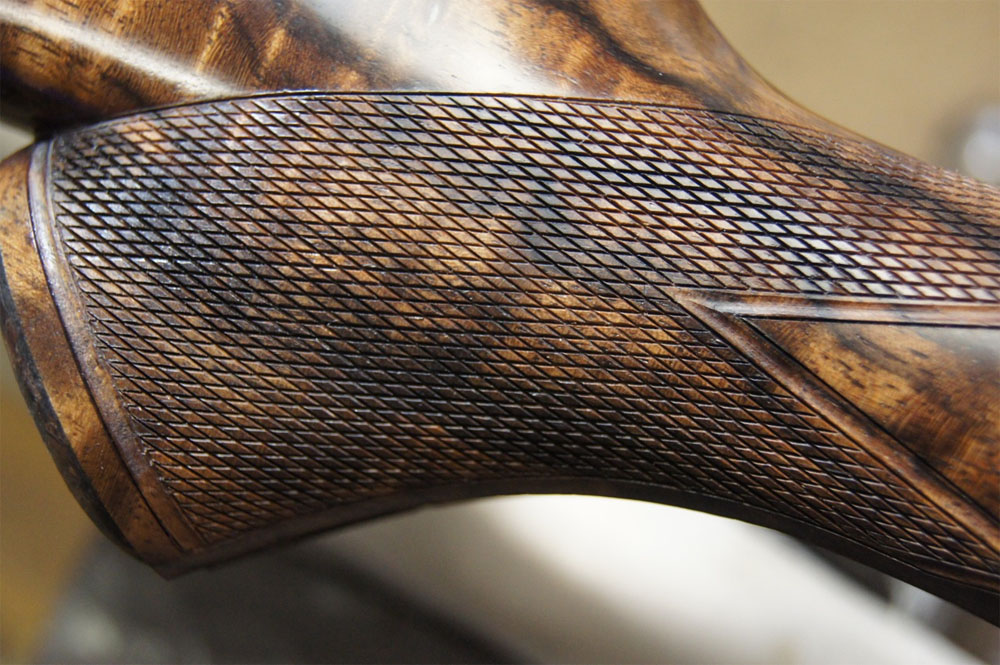
27. Aligning the fore-end tip for inletting.

28. Fore-end tip inletted.

29. Fore-end outside profile "made-off" (final shape).
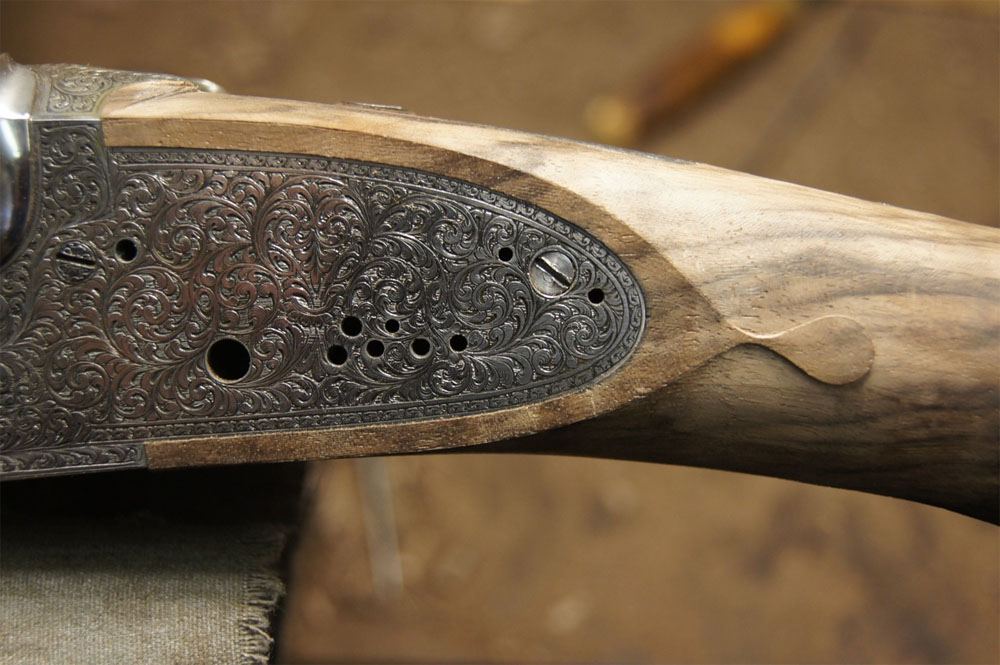
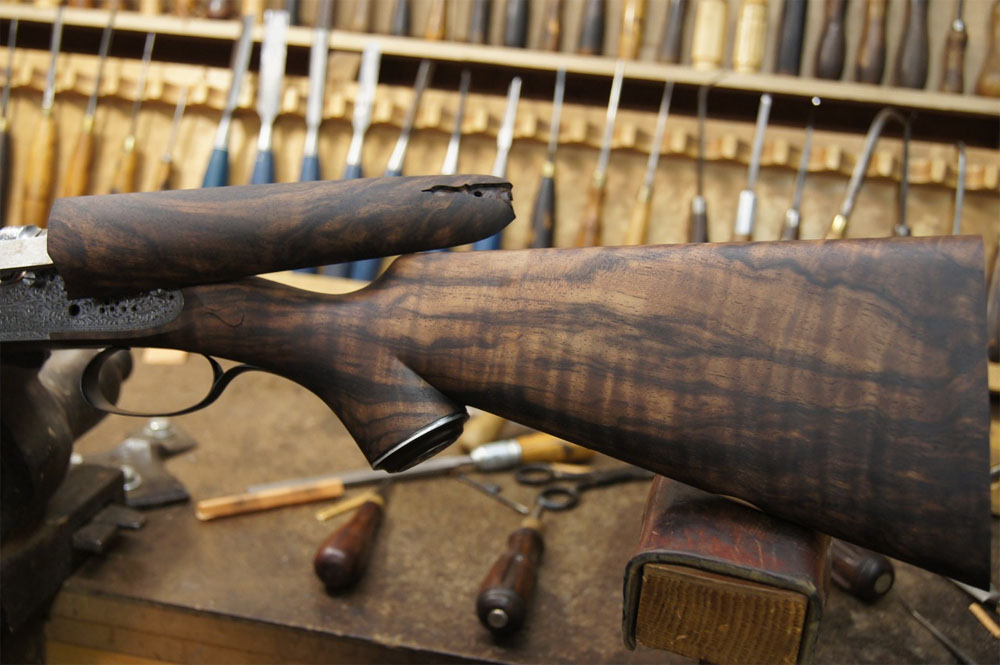
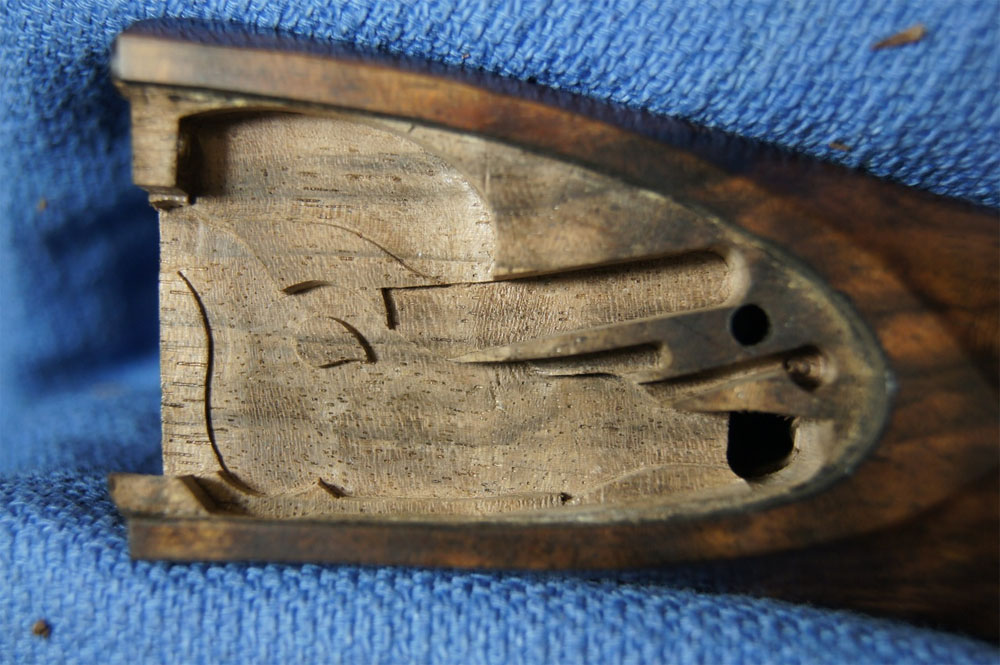
30. View showing barrel channels etc. final shape.
31. Stock and fore-end with barrels attached prior to "wet & dry" (sanding smooth, raising and removing the grain).
32. Stock and fore-end smoothed, gold oval fitted (under toe-line) and one coat of "red-oil" applied.
33. Right side of stock.
34. Grain mostly filled, laying out chequering-- 20 l.p.i.
35. Chequering pattern layed out, English flat-top style. Will be cut over again when finishing is completed.
36. Finishing complete, chequering cut in to full depth including "muller" lines (concave borders) and coat of oil applied.
37. Fore-end finished with new tip pin.
38. Other side.
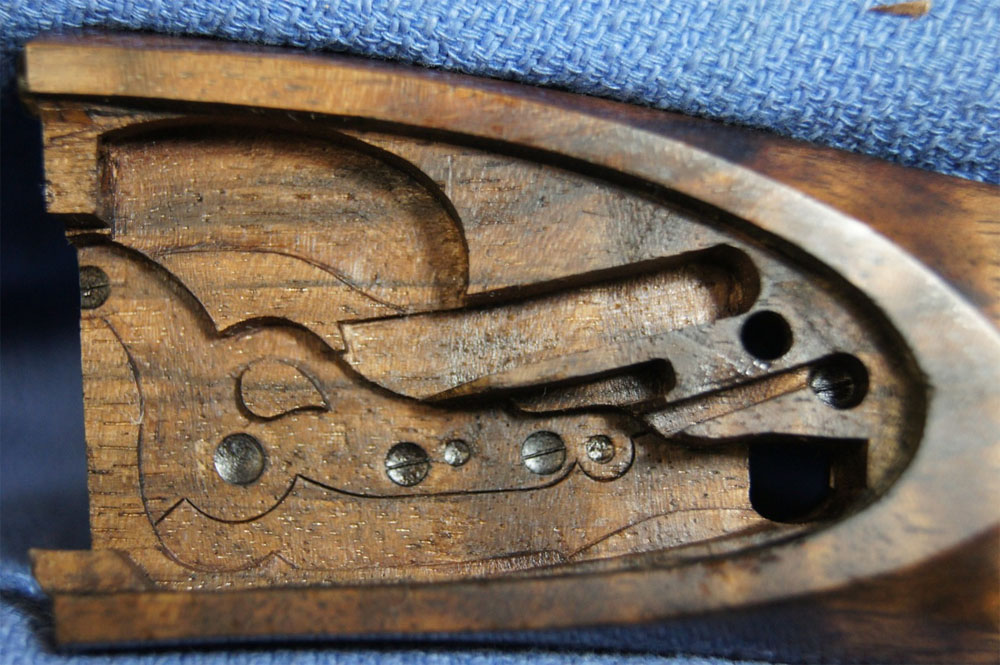
39. Left side lock inletting prior to "cut-over" (re-cutting of all surfaces including trigger and top safety area, for cleaner look).
40. Left lock inletting after "cutting-over".
41. Left lock after cut-over with pin head and axle impressions and cut in shape of bridle outline, all decoration purposes only.
42. As previously with a coat of oil applied.
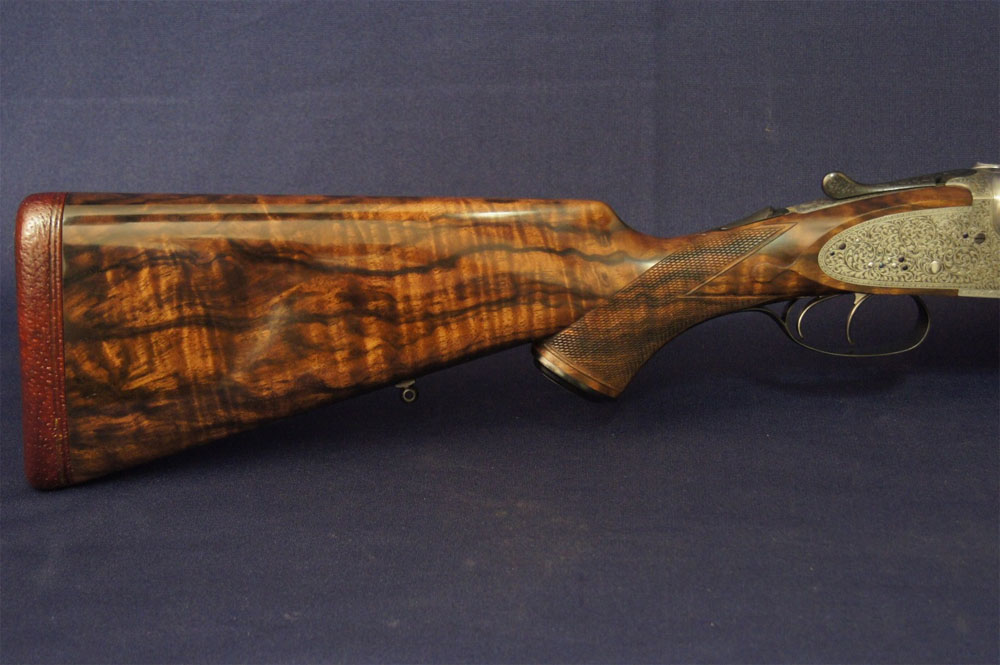
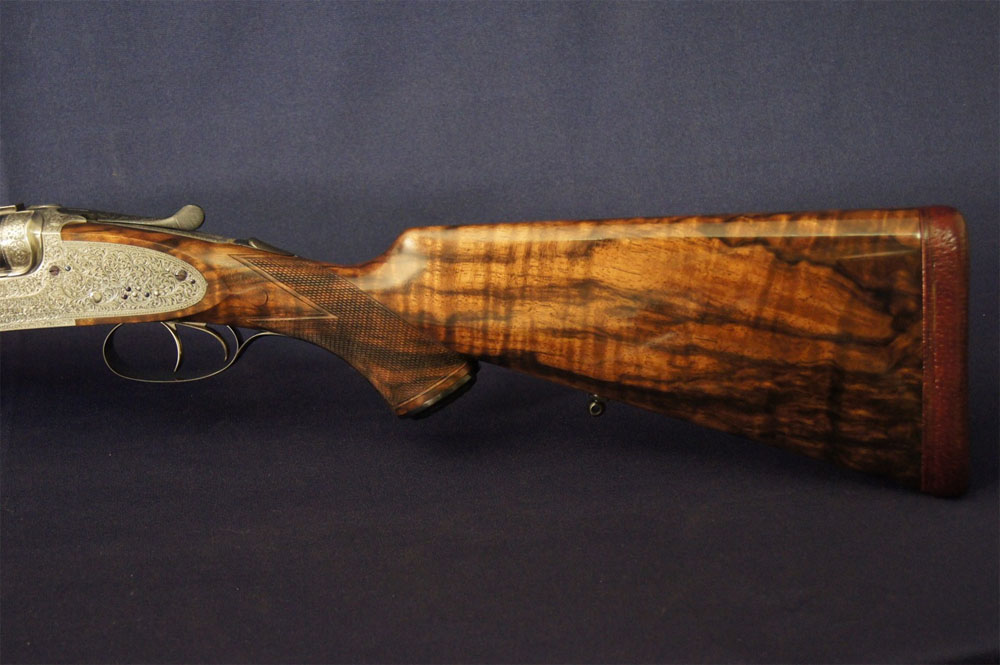
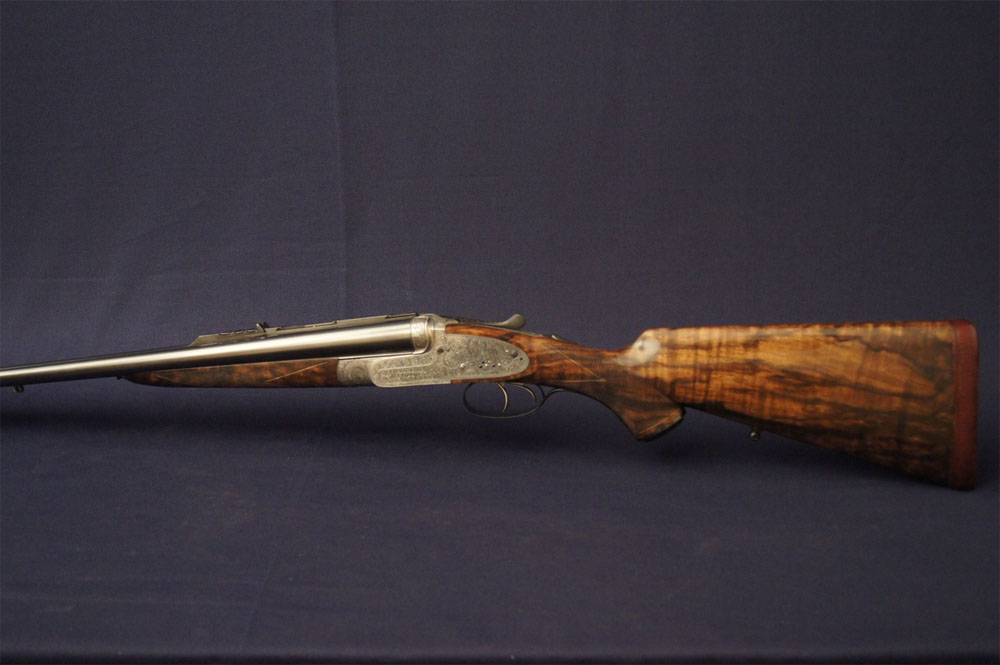
The Finished Rifle
W.J. Jeffery cal. .400EX SLE d/rifle No.10043